Let’s see how to control the Noise Control and Siri with your new Airpods and switch between them.
What are the Noise Control Modes in AirPods Pro
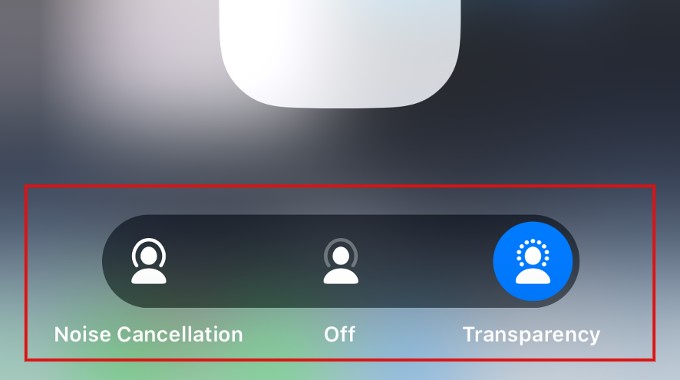
Whether you have AirPods or a new AirPods Pro 2, there are three noise-control modes: Active Noise Cancellation, Transparency mode, and Off. Active Noise Cancellation (ANC) feature allows you to block out external noise using white noise. Transparency mode lets you hear the voices around you quite clearly, even if music is playing. If you don’t want to use any of these two modes, it can be set to Off.
How to Switch Between Noise Control Modes Using AirPod Pro Stems
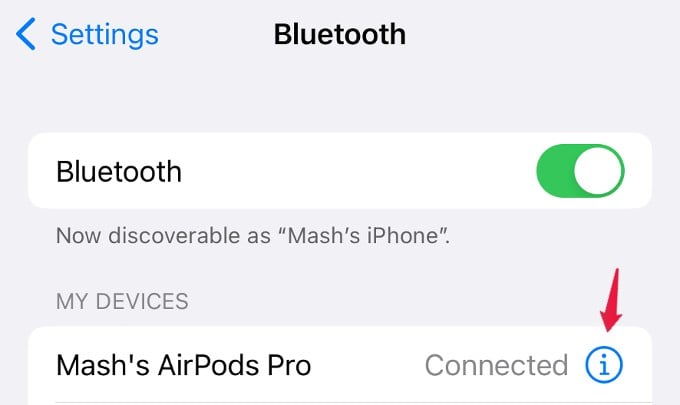
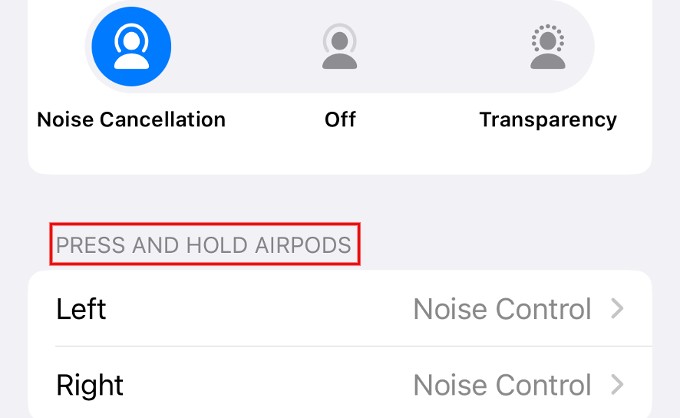
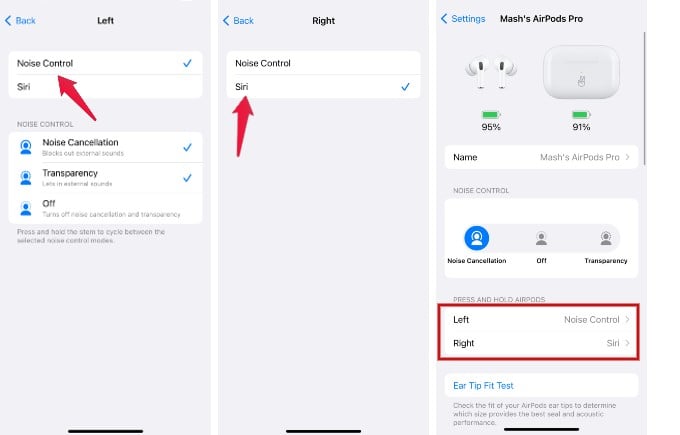
Sometimes I find it lazy to get up and pick up my iPhone to turn on ANC while hearing my favorite music. And I felt so relieved and happy to find that you can switch between noise control modes or activate Siri using your AirPods stems. Let’s see how to do that. Before you begin, ensure you are wearing your AirPods Pro and connected to your iOS device. Go to Settings on your device and tap your AirPod name. Alternatively, you can also navigate to Settings->Bluetooth and tap the information icon shown next to your AirPods. In the new AirPods Settings Screen, look for the section PRESS AND HOLD AIRPODS. Here, you can see two fields Left and Right, to configure both AirPods. By default, both AirPods Stem is set for Noise Control. It will be a good option to use one AirPod for Noise Control and another for activating Siri. When you tap on Left, you will see a new screen titled Left. In that, select the option Noise Control. Now, you can switch between ANC and Transparency mode whenever you press and hold the force sensor on your left AirPod. Likewise, tap on Right and make sure its value is set to Siri. That’s it. From now on, you can easily switch between Noise Control modes or activate Siri by pressing and holding the stem on your AirPods Pro. Notify me of follow-up comments by email. Notify me of new posts by email.
Δ


