Because there is no snipping tool scrolling screenshot feature. If you want to take full page screenshots on the web, for example, you would have to take multiple screenshots after scrolling to different portions of the page. Fortunately, browsers today have built-in tools to help you take scrolling screenshots in Windows, macOS, or Linux. To take scrolling screenshots in other apps, you will need third party apps.
How to Take Scrolling Screenshots on the Web
Microsoft Edge, the default browser on Windows 10 and 11, has a few additional features compared to Chrome. And while some of them are not very helpful, the built-in screenshot tool can come in handy. Another browser with a built-in screenshot tool is Firefox, which is also the only mainstream browser today not based on Chromium. If you use Google Chrome, you will need to install an extension.
Take Full Page Screenshots in Edge
You can take full page screenshots in Edge using the Web capture tool. You can also click on the Copy icon next to the save icon to copy the screenshot to the clipboard instead.
Full Page Screen Capture on Firefox
Firefox also has a built-in tool to take screenshots, and it is labelled exactly that on the context menu, Take screenshot. Firefox does not offer options to annotate or edit the captured screenshot in any way. So you will have to rely on other apps for that.
Screenshot Whole Page on Chrome
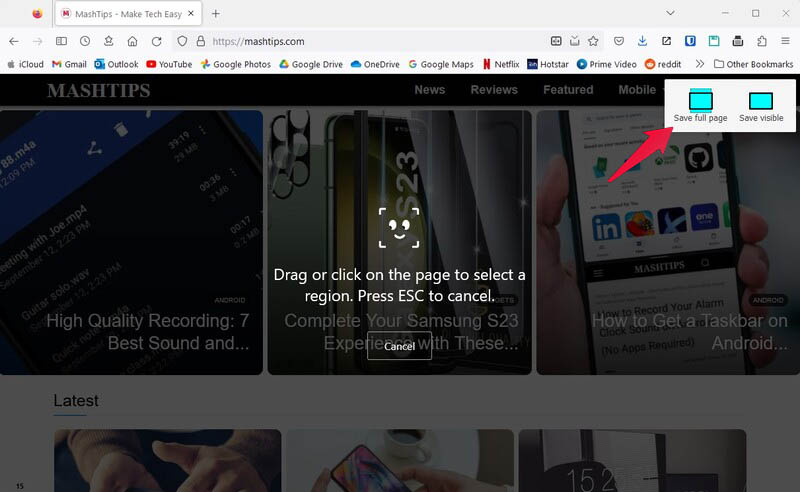
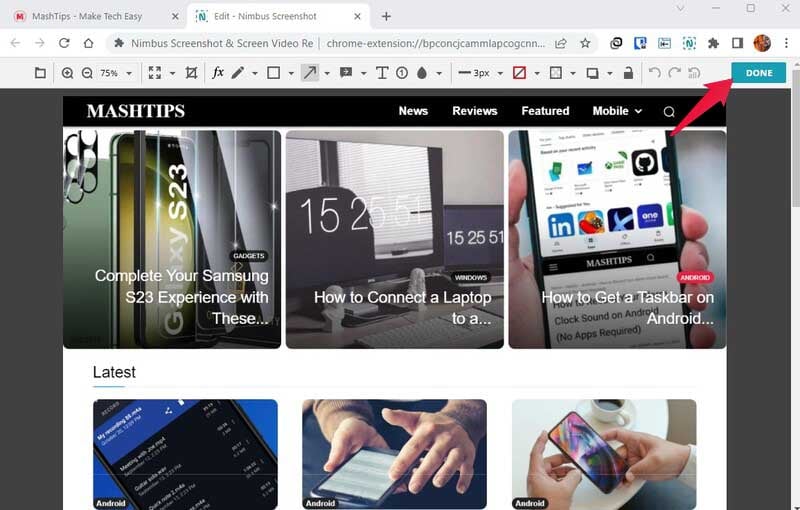
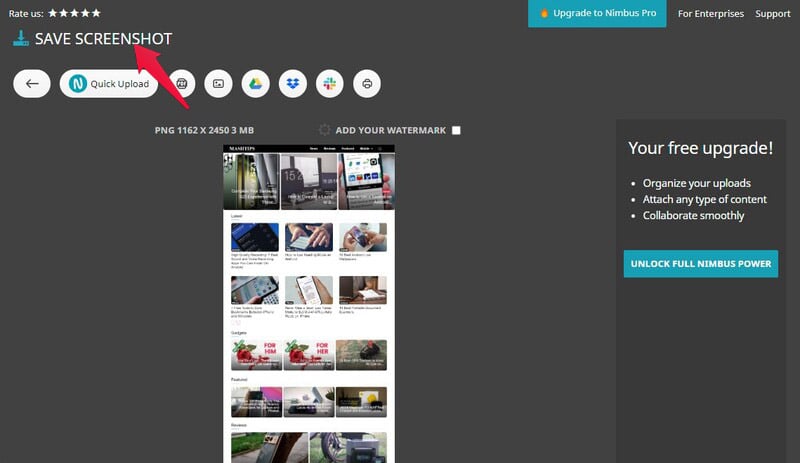
On Chrome, the screenshot feature is still experimental and as such hidden by default. You can enable the flag manually. However, even that is a very basic screenshot tool, only letting you capture a rectangular area visible on the screen. So, you will have to rely on third-party extensions that have the ability to take scrolling screenshots. You can take scrolling screenshots in Chrome on Android, though. Some popular Chrome extensions for taking full page screenshots are Fireshot, Nimbus, Scrnli, and Webpage Screenshot. For the sake of this demo, we will use Nimbus because, well, I like its icon more, and it has pretty much all the features one would want.
How to Take Scrolling Screenshots on Windows
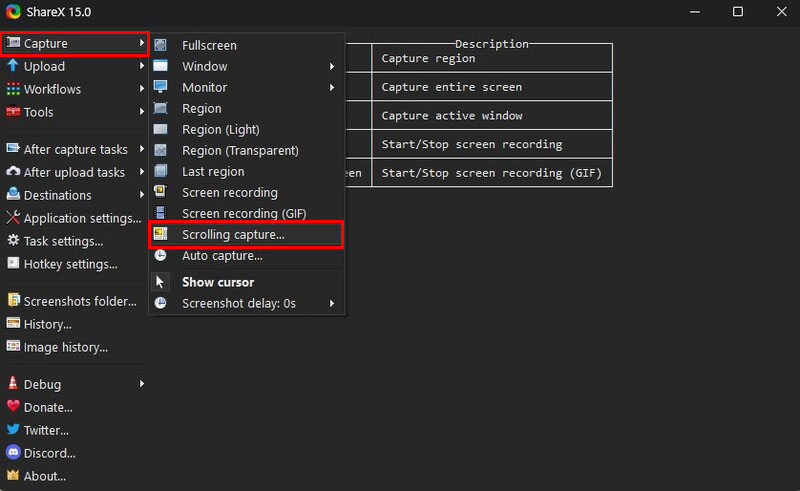
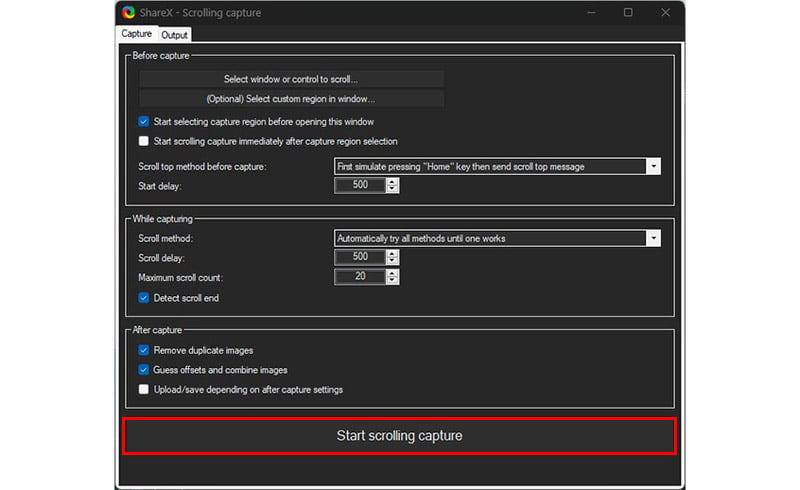
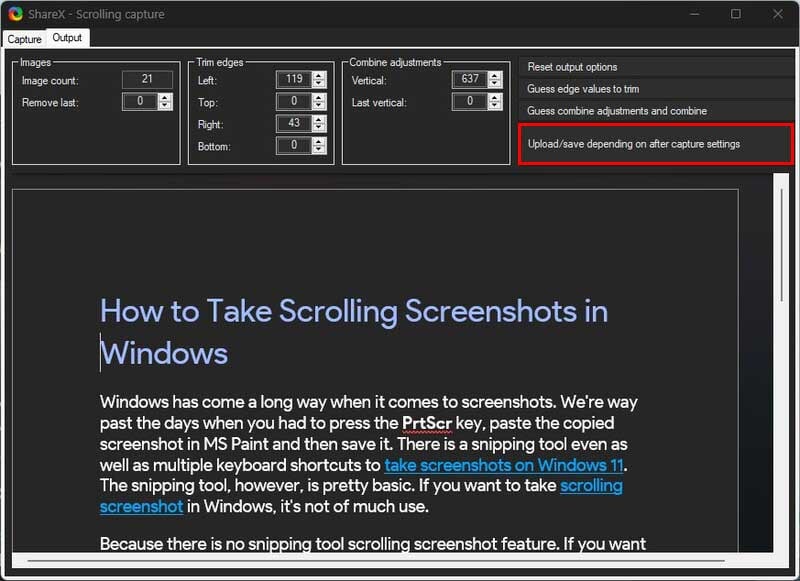
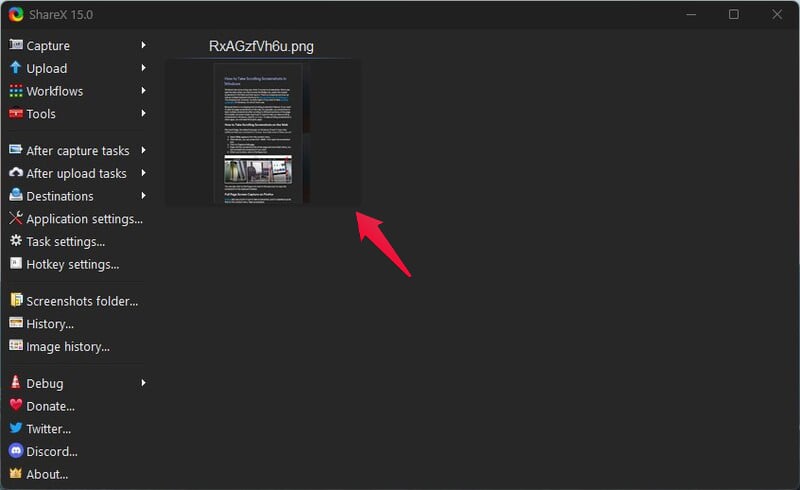
Typically, you would be fine just using the built-in screenshot features on Windows. The Snipping tool does a decent job and has a decent number of options people commonly want in a screenshot utility. There are some third-party screenshot tools available for Windows, though with plenty more features. Not many of them let you take scrolling screenshots in Windows, however. ShareX is one of the best screenshot tools and does have the ability to tale long screenshot in Windows. This works in desktop apps such as Word, Excel, etc. as well as web browsers. You can install the app for free from the Microsoft Store by searching for it or using the link below. Download: ShareX When you’re ready, click on the Upload/Save depending on after-capture settings button. The screenshot will be saved in /ShareX/Screenshots inside your Documents folder. If you haven’t changed it, this is found at the following location. You can also find the screenshot in the ShareX app window. The app can seem a little complicated and remind you of the era when desktop apps had tiny menus and were full of options. But it is actually easy to use. And that’s all the different ways you can take scrolling screenshots in Windows. Taking scrolling screenshots in Windows can be incredibly useful for capturing full web pages, documents, and other content that may not fit on a single screen. With the right tools and techniques, you can quickly and easily capture these larger images and save them for later use. So why wait? Start taking scrolling screenshots in Windows today and take your productivity to the next level. With this powerful tool at your disposal, you’ll be able to capture and save full web pages and documents with ease, streamlining your workflow and improving your overall productivity. Notify me of follow-up comments by email. Notify me of new posts by email.
Δ